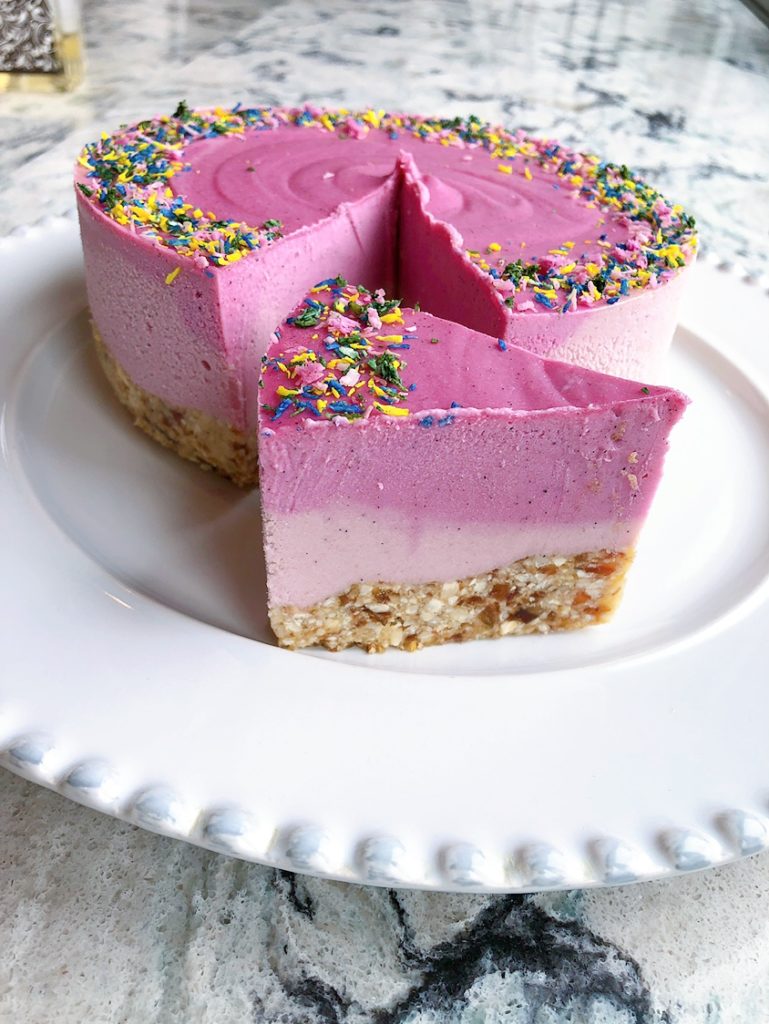
This raw cheesecake reminds us of a vegan ice cream cake – needless to say its delicious and is a great dessert option for the warmer weather! The filling is made from cashews and sweetened with maple syrup. We topped it with some of our homemade colorful coconut flake “sprinkles”.
Ingredients
Crust
-
- ½ cup raw cashews
- 3 soft medjool dates, pitted
- 1 tbsp maple syrup
Filling
-
- ¾ cup raw cashews, pre-soaked & strained*
- ⅓ cup coconut cream from chilled full fat coconut milk**
- 3–4 tbsp maple syrup (to taste)*
- ½ tsp raw ground vanilla bean
- 1/8 tsp salt
- 1¼ tsp (or more) pink pitaya powder
Instructions
- Process all crust ingredients in a food processor. Transfer into a 4″ springform pan and press down into an even flat crust. Freeze while working on next step.
- Add all filling ingredients, BUT ONLY ¼ tsp pitaya powder, to a power blender and blend into a smooth creamy consistency. Remove a third of this mixture and pour it into the springform pan over the crust, trying to keep it mostly to one side (let’s say keep it to the right).
- Add in ½ a tsp more pitaya powder to the remaining mixture in the blender and blend once again to combine. Transfer half this mixture into the springform pan, placing it mostly into the center, or slightly to the left side.
- Add another ½ tsp pitaya powder to the remaining mixture in the blender and blend to combine. Transfer this mixture into the pan, pouring it mostly to the left. Now use a skewer or a small spoon to lightly swirl the mixtures together. I used a circular motion and went mostly around the edges of the pan to create a swirled effect. Feel free to improvise — just don’t over-mix or the different layers will merge into one color.
- Decorate with desired toppings. Freeze for 6 hours or overnight. Keep frozen until serving time; let thaw for 10 minutes before serving. Slice and enjoy! Keep any leftovers frozen.
Notes from the author:
*To pre-soak nuts: place in a glass bowl, cover with water, and leave to soak for 4 hours (or overnight in the fridge). Then strain and discard the water. For a quick pre-soak, cover with boiled water and soak for 15 mins, then strain and discard water. (Note: this technique doesn’t preserve the nutrition of the recipe as well as the traditional soaking technique above). Note: the purpose of soaking the nuts is to re-hydrate them and plump them up for blending into a smooth, cheesecake-like consistency. Proper soaking techniques also maximize nutrition and digestibility.
**The coconut cream used in this recipe is only the firm white stuff gathered at the top of a chilled can of full-fat coconut milk. You’ll need to chill the can in an upright position overnight for the cream to separate from the water and surface up to the top. I used the Thai Kitchen full fat coconut milk cans for this recipe and I find that the large 400ml cans yield about ¾ cups cream each once chilled and separated, and the tiny cans (160ml) yield about ⅓ cup cream each (I prefer working with the smaller cans as they seem to separate better). Reserve the remaining water for other uses, only use the firm white cream here. Note that it’s very important for the full fat coconut milk cans to be chilled first so it separates.
Recipe modified from Unconventional Baker

